Getting Started with XCP-NG and Xen Orchestra
Over a year ago I posted Bye Bye ESXi, Hello XCP-NG but never followed up with a how to. My lab has evolved quite a lot since then and has mostly moved into a collocated space which you might know if you've checked out the My Lab portion of my website. When the majority of my lab moved I purchased a single Supermicro SYS-5018R-WR to serve as my primary home hypervisor as there are still VMs I like to run at home. This gave me an excellent excuse to try out the new XCP-NG 8.3 alpha as well as show how to install the hypervisor, setup a ZFS SSD pool, bootstrap Xen Orchestra, import ISOs, and spin up VMs.
There will be a later post / video on some more advanced features of Xen Orchestra as well as a more detailed walk through of the interface.
If you prefer a video format it can be found here
Installing XCP-NG
Before getting started you can download the latest XCP-NG LTS from here https://xcp-ng.org/#easy-to-install or you can grab the 8.3 Alpha here https://xcp-ng.org/blog/2022/11/18/xcp-ng-8-3-alpha/
Once the ISO is downloaded, you can burn it to a DVD, write it to a flash drive with RUFUS, drop it on a flash drive with VENTOY installed, or mount over IPMI. Then boot into the installer, you'll be greeted with a welcome screen:

Proceed by pressing Enter on the ok button. XCP-NG will check for existing installs. You will then be prompted to accept the EULA , arrow over to Accept EULA and press Enter if you agree. If the installer found a previously installed version on the disks you will be prompted to upgrade or clean install:

Select which option is best for you, I will use clean install because I want to start fresh. The next step is picking the primary disk where the OS will be installed to. This should be at least 64GB in size and not a flash drive.

I'll be using my SATADOM, if you have multiple you can select Software RAID to install XCP-NG to a mirror of 2 drives. Select the disk and press Enter to proceed. Next we will tell the installer which disks we would like to use for Virtual Machine Storage. Xen refers to these as storage repositories.

In my case I'll be using the 4 SSDs in the system with ZFS so I will leave this unconfigured and proceed by selecting Ok and pressing Enter. I will receive a warning for not selecting any drives for Virtual Machines but can proceed.
Next you'll be prompted to pick your install source, select Local media and proceed. You'll then be prompted to verify the install source, I would recommend verifying. This can take a while depending on the type of media you're using for the installation.
If there are no issues the next prompt is for the root password:

Enter a strong password you remember and proceed. Next we need to select the management interface from a list of connected network adaptors:

Select the NIC you want to use then proceed to IP configuration

You can pick elect to get your IP address from DHCP or set it statically. You can also enter a VLAN ID if you're using tagged VLAN interfaces on your switch. Enter the configuration how you would like and then proceed to DNS information

The installer will generate a random hostname starting with "xcp-ng-" which can be changed. You will also want to set your DNS servers here, up to 3. Then proceed to time zone selection.

You can press a single character to jump to a geographic area, then arrows to select the proper one. Find the correct area for you and then proceed to the specific time zones. You can press a single character to jump to a time zone, then arrows to select the proper one again. Find the correct time zone then proceed to time settings.
You have 2 options for setting time:
- Use NTP
- Manually
I would recommend using NTP.

If you have internal time servers you can enter them here in a tiered list. I used pool.ntp.org for my configuration. Proceed to the final step to confirm the install or return to a previous step. Like verifying the install source this can take a while depending on the type of media you're using for the installation.

Part way through you'll be prompted to install supplemental packs, you can ignore this for now and continue the install. Once it's finished you will be greeted with this to confirm it:

Remove the install media and press enter to reboot into XCP-NG.
Installing ZFS and Adding the Pool as a Storage Repository
Once the server reboots you can proceed with the following steps either on the console or over SSH. I prefer SSH as you can copy / paste. We want to install ZFS and configure our host to use it for VM storage.
Enter the below commands to install ZFS and import the drivers without requiring a reboot
yum install zfs
modprobe -v zfs
Next we need to identify the disks we want to use in the pool to construct our command
ls -l /dev/disk/by-id/ | grep sd[a-z]$The output will look like this

Take node of the ata- portion of the top and record the full string for each drive you want to use in the ZFS pool.
Next we'll create our zpool and verify the status. You can use any of the ZFS pool types here, RAIDZ, RAIDZ2, etc. by adjusting the command.
zpool create -o ashift=12 -m /mnt/zfs tank mirror disk1 disk2 mirror disk3 disk4
zpool status tank
This will create a pool with the option ashift=12, mount it at /mnt/zfs, name it "tank", and build it using 2 mirrors. Then status will show you the built pool:

Now we have a functioning ZFS pool, but we need to tell XCP-NG how to use it. For that we need the UUID of the host:
xe host-listTake note of the UUID of the host and then we'll run the xen command to add a new storage repository and some ZFS commands to adjust some options for sync, compression, and atime:
xe sr-create host-uuid=hostuuid type=zfs content-type=user name-label=LocalZFS device-config:location=/mnt/zfs/
zfs set sync=disabled tank
zfs set compress=lz4 tank
zfs set atime=off tank
Finally we need to add some more memory to dom0, where XCP-NG and this zpool is running on. The default memory allocaiton is a bit small for ZFS so we will set it to 16GB and reboot to apply.
/opt/xensource/libexec/xen-cmdline --set-xen dom0_mem=16384M,max:16384M
reboot
Bootstrapping Xen Orchestra
Xen Orchestra can be installed a few ways found below along with their pros and cons
- Navigate to https://xen-orchestra.com/#!/xoa and enter the information from your host to deploy the office XOA image
- This is the official way supported by Vates, you will get a trial of Xen Orchestra's Premium tier after registering Once the trial is over it will revert to the Free version. Here is a full comparison of features. You will miss out on advanced options including some backup features with XoA Free.
- Create a new VM then build and install Xen Orchstra from sources
- This method compiles the source code for Xen Orchestra from Github. It is free and has nearly all of the features aside Hub and Recipies. This is the most "secure" method to build the sources. It is not supported officially by Vates.
- Create a new VM then build and install Xen Orchestra from a script
- This is the method I use in production. The script automates the building process and includes functionality for upgrading, reverting to previous versions, and building proxies. There is trust that needs to be placed in the script but it is open source and can be reviewed.
- Import a pre-configured XVA template VM with Xen Orchestra from sources pre-installed
- This method imports and XVA and imports a VM that was created by using ansible and the above script. It is a small Debian VM with Xen Orchestra pre-installed. It is great if you want to bootstrap style install from the command line for a single host. There is trust that needs to be placed in the VM but the build method and script are open source and can be reviewed.
For this instance I'll use the XVA image for demonstration purposes as I already have a VM built on my main cluster I'll be adding this into later.
SSH back into the host and run
sudo bash -c "$(curl -s https://raw.githubusercontent.com/ronivay/XenOrchestraInstallerUpdater/master/xo-vm-import.sh)"You'll be prompted to select the storage repository and network you want to use for the VM, I used the ZFS pool created earlier and my 10g uplink. The output will look like:

Once the import is finished and the VM boots the script will output the IP address as well as username and password for the Web GUI and SSH

This information is pulled from the management agent installed on the VM that the script imports, very good use of tooling!
Using Xen Orchestra
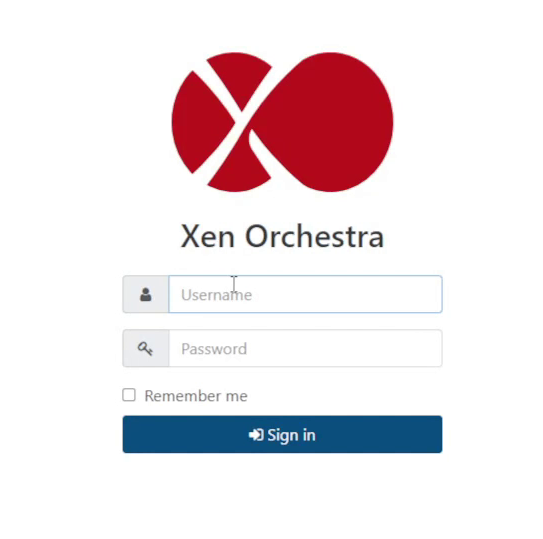
Navigate the the URL in a browser and bypass the security warning from the self signed SSL certificate and you'll be greeted with the Xen Orchestra login page. Use [email protected] and admin as mentioned in the script to login.
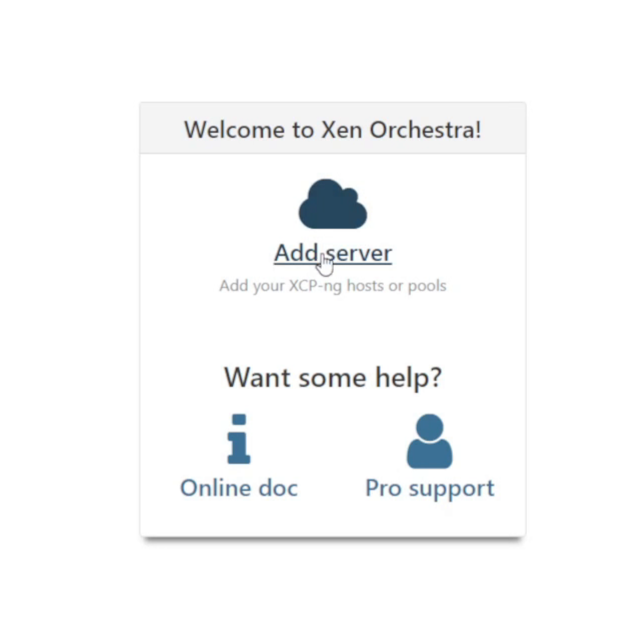
After the login you'll be shown a fairly empty screen as there are no hosts and therefor no pools, storage, or VMs! To fix this click on Add server on the page or go to Settings -> Servers
Here there are several fields to fill out. Make sure to enable the SSL slider to allow the use of the self-signed certificate on the host. You can likely ignore HTTP proxy URL.
| Field | Description |
|---|---|
| Label | Server name |
| address:[port} | Server IP or hostname and the port if non-standard |
| username | Username, usually root |
| password | Password set during install |
| Certificate Slider | Enable or disable unauthorized SSL certificates |
| HTTP proxy URL | Proxy URL if needed to communicate over HTTP with the server |
Now going to Home -> Hosts we can see the host we added just now

Clicking on the host gets us more detailed information
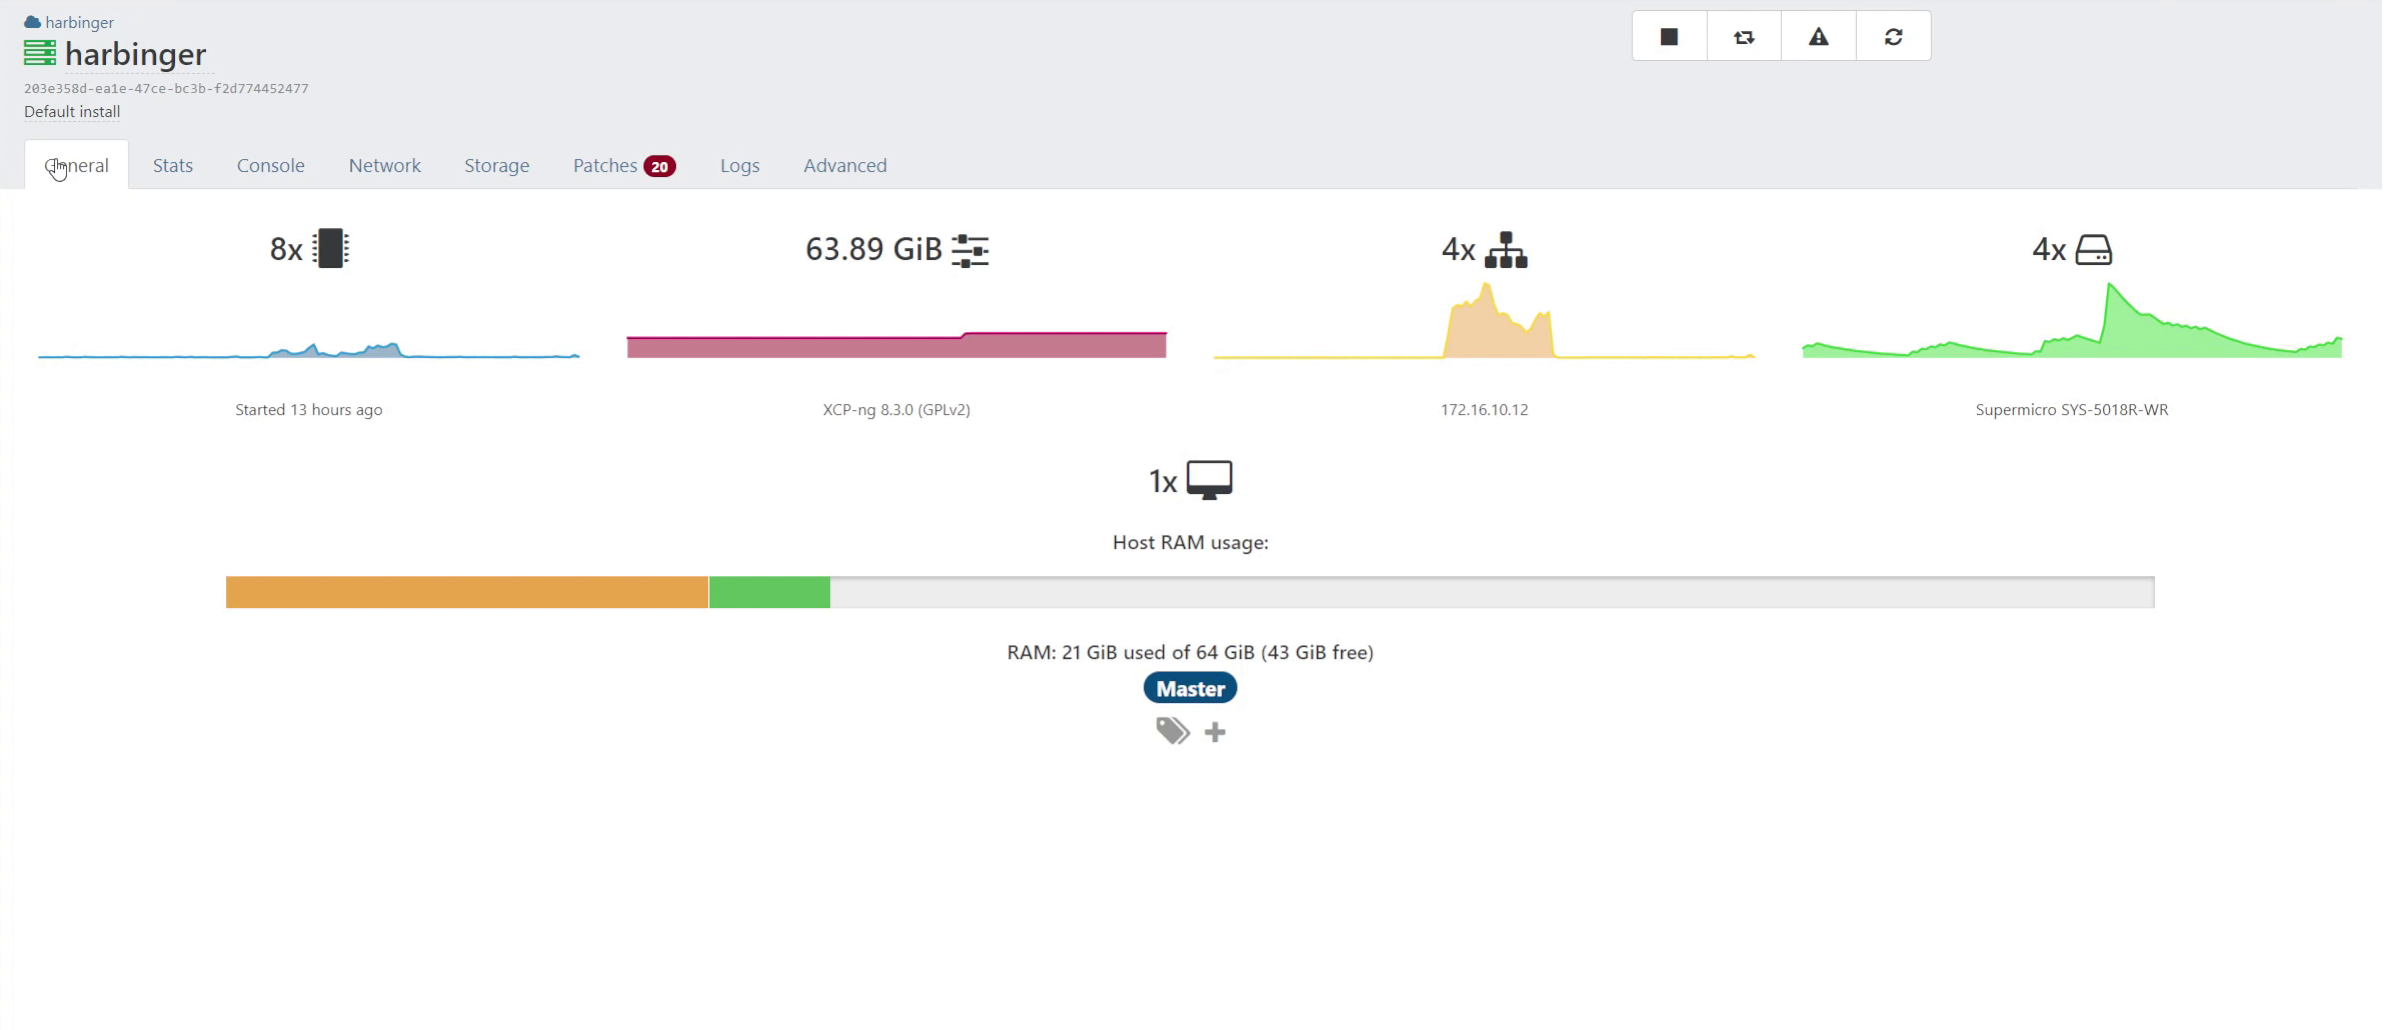
We can see the number of CPU cores and usage, amount of RAM and usage, number of NICs and usage, number of Storage Repositories and usage, number of VMs, a graph of RAM usage by dom0 and each VM, how much RAM is used and available, if the host is the pool master, and any tags.
The orange portion of RAM consumed is the 16GB we assigned to dom0 and the green represent VMs.
Along the top are also stats, console, network, storage, patches, logs, and advanced options. Stats provides more detailed statistics on usage on various time scales. Console shows you the host console where commands can be run. Network shows the Physical Interfaces (PIFs) on the host, their IPs, and any VLANs. Storage shows all of the Storage Repositories available on the host. Patches show any updates. Logs and advanced are self-explanatory.
Advanced includes a GUI option to set the amount of RAM for dom0 also.
In the top right are buttons to stop the host, reboot the xen tool stack, put the host in maintenance mode, and reboot the host.
One contextual feature found around the GUI is the use of dashes under text to indicate the ability to edit it by holding left click. Seen here under the host's name and description

You can also see the pool the host belongs to above the name, UUID, and description.. Xen servers always have pools, even if it is a single host. The pool is named after the first host that joined it and can be edited.
Going to Home -> Pools we can see all of the pools Xen Orchestra can see, the design looks similar to the hosts:

We can see information on the pool such as number of hosts, number of storage repositories, number of VMs, RAM used and available, which host is the master, and any tags.
Along the top is stats, network, patches, logs, and advanced. These are all similar to the same tabs in host but are pool-wide instead of a specific host.
In the top left again is the pool name, UUID, and description.
If we go to Home -> VMs there is a list of all VMs running. Filters can be applied here if you want to see VMs only from specific pools or hosts, or all VMs including those which are off.

Here we can see information on the VM such as assigned CPU cores and usage, assigned RAM and usage, network interfaces and usage, the size of all drives and usage, uptime, and tags. If the management agent is installed you will also see the type of OS installed and the agent version. Hovering over the OS image will provide information on the boot drive the OS is installed to.
On the top left you can see the pool and host the VM is running on along with the name, UUID, and description.
Stats, console, network, disk, and logs are very similar to the other sections. However snapshots, backup, and advanced here are important. Snapshots and backups are self-explanatory. Advanced contains some important options for VMs including:
- Auto power on
- Protect from accidental deletion
- Protect from accidental shutdown
- Nested virtualization
- Affinity host
For the Xen Orchetra VM we want to enable Auto power on as well as protect from accidental deletion. This way when we reboot the host the VM will boot up automatically. This is important for VMs providing infrastructure or dependencies for other machines such as domain controllers, DNS, or DHCP servers.
Since the host had patches available before moving on I'll install those. Go back to the host by going to Home -> hosts and clicking on your host, then go to the patches tab. Here are all of the pending patches and an install button
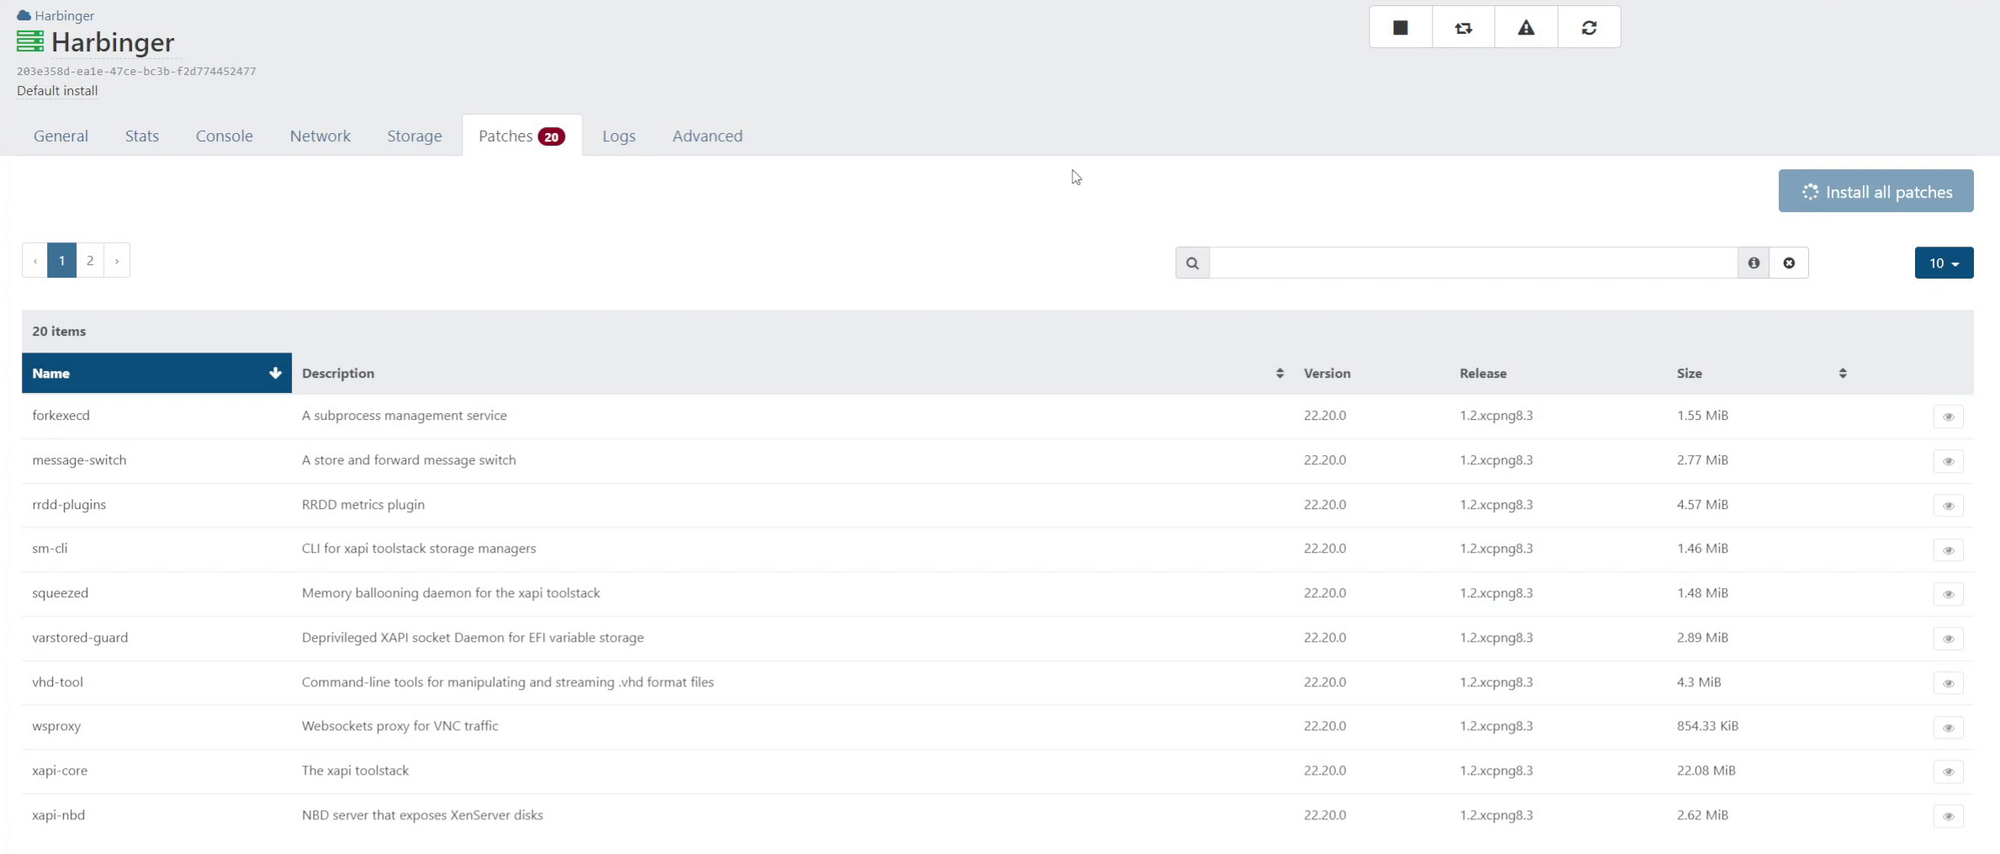
This is usually pretty quick and most don't require an immediate host reboot though it is recommended. Once the updates are installed I will do a force reboot on the host as there isn't another host in the pool for the VMs to migrate to. This will still use the management tools to gracefully shut down any running VMs. The option is found under Advanced.
Once the host reboots Xen Orchestra will power back on automatically thanks to the setting we adjusted earlier.
So far we've done some basic customization but now we will move on to making some ease of use changes. Go to home -> pools and click on the pool you want to edit. Click on the Network tab to view all networks on the pool. Long press on the network names to adjust them. I'm going to change eth0's network to "Management Network" and eth3's network to "Production Uplink". This will propogate down to all of the hosts in the pool. I will also enable "Automatic" on this screen for my Production Uplink so that new VMs will automatically have this network added as an interface. You cannot remove the other networks, but if you want to avoid confusion they can be named "unused".
This is also the screen to add new networks or add a VLAN tag to an existing network. Adding a new network can also leverage VLAN tags, this is useful if you have a dedicated storage or management network.
Going back to our host we can see that the network naming did propagate down.
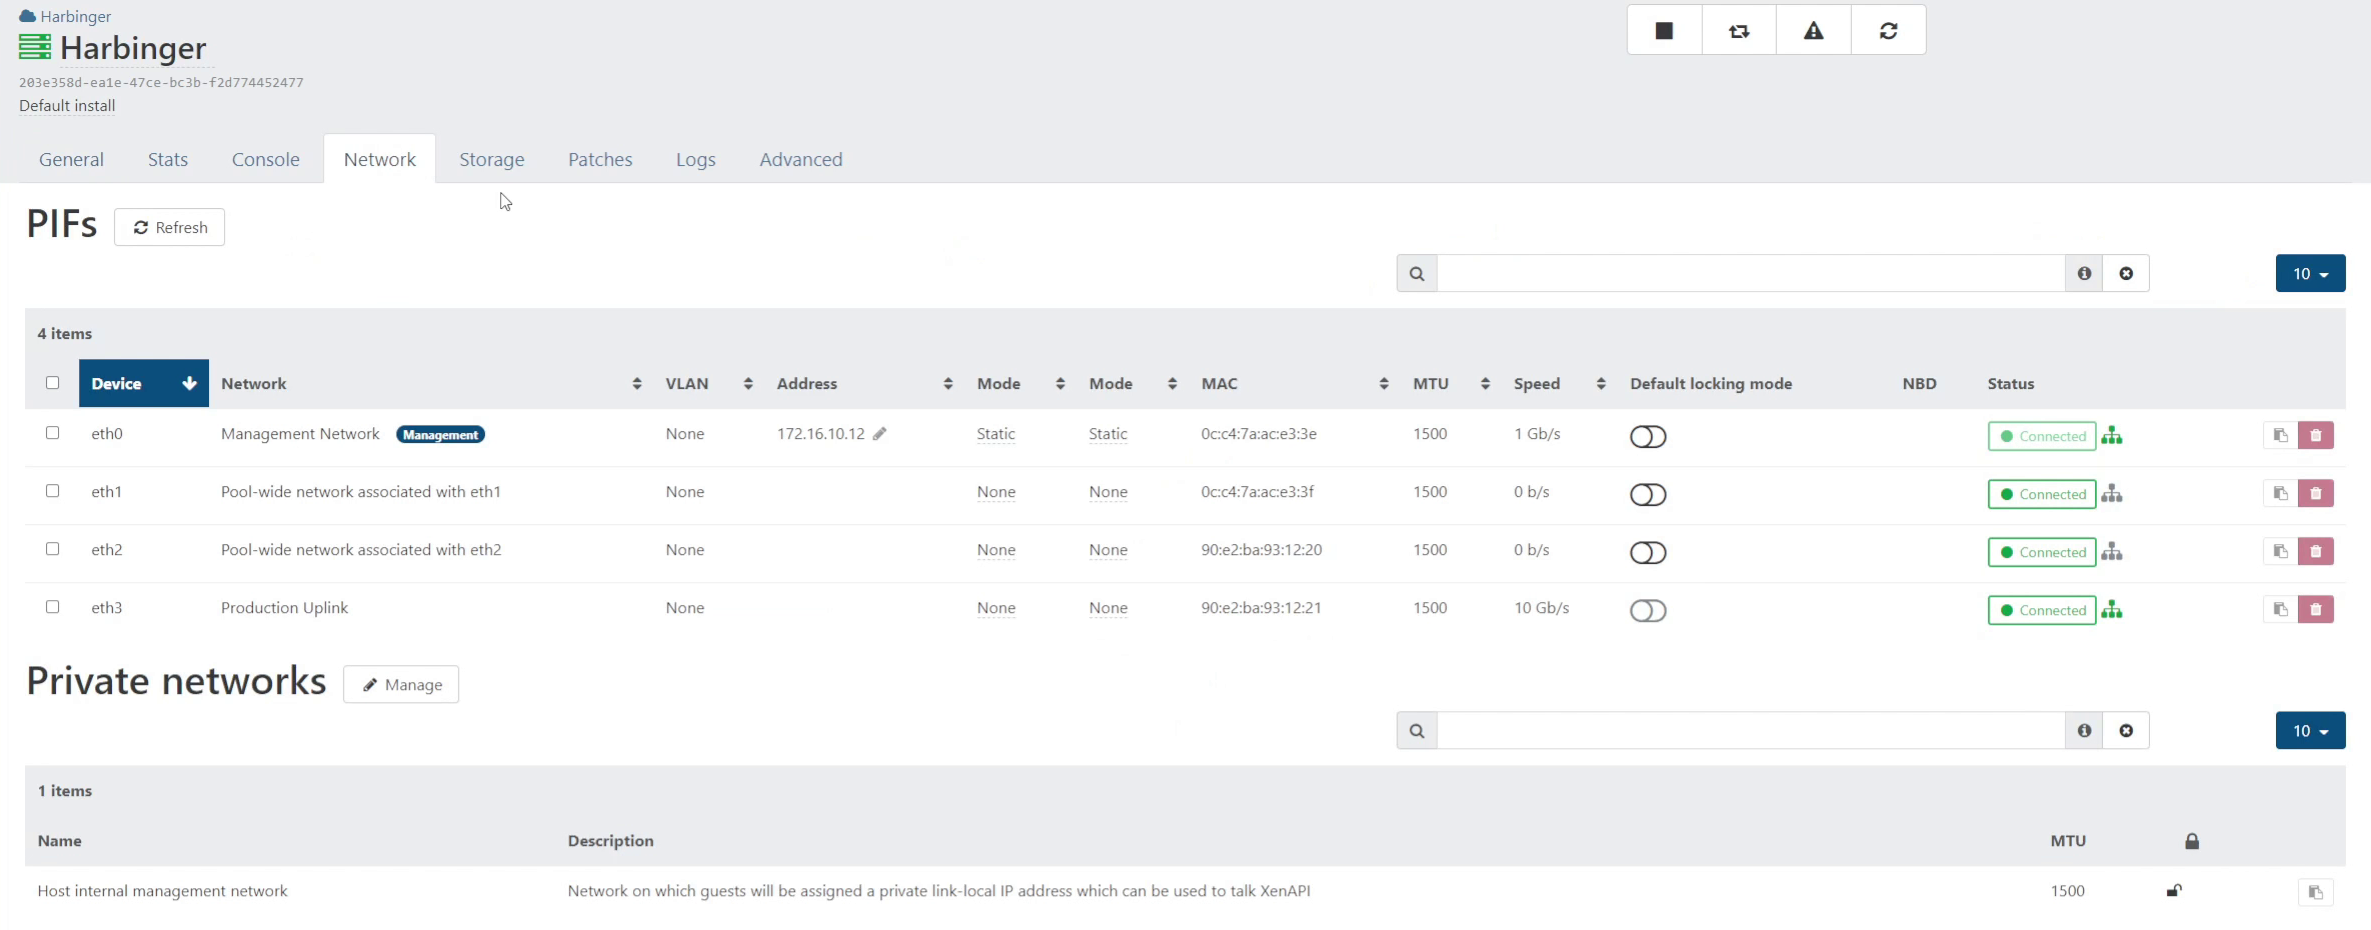
We can also see the VLANs for each interface here if they had one assigned from the pool, as well as the address, mode (static / DHCP for IP), MAC, MTU, speed, and status. As indicated by the dashes under the text and the pencil many of these fields can be edited.
At the bottom is private networks which is an advanced concept that won't be discussed in this post.
Managing ISOs and Templates
Before we start making VMs we will first create and ISO repository on the ZFS pool we created.
SSH into the VM and run this command to make a new folder under /mnt/zfs
mkdir /mnt/zfs/isosBack on Xen Orchestra go to New -> Storage
Select the host you want to add it to then enter a name and description, select the Local type (you can use SMB or NFS also), and enter the path we created in the last step /mnt/zfs/isos then click create. Once it's created the Storage Repository page will open. The UI design follows from other pages to here too:

We can see the number of disks / ISOs in this repository, the storage available, hosts it's connected to, size used of any disks / ISOs, and any tags. The tabs are familiar here: stats, disks, hosts, logs, and advanced, all performing the same function as other areas.
In the top right are options to re-scan (to check for new images), reconnect to hosts, disconnect, and forget.
Now that the repository is created, we can go to Import -> Disk to upload an ISO

Pick the SR to import to and drop and drop and ISO or click to select one. Then you can enter a name and description, then import. This can take a bit depending on the size of the disk, SR speed, and network speeds. In my instance I'm going to use a Windows Server 2022 ISO.
Now Windows VMs are great, but what about Linux? You can follow the same method with the ISO for your favorite distro, but I have a preferred method: cloud-init. First, let's get a template. You can build these yourself if you wish, but my preferred distro, Ubuntu, has an OVA with most of what I need installed already.
Go to https://cloud-images.ubuntu.com/focal/current/ to find the downloads for the latest Ubuntu Server 20.04 version. You could go higher but the process to get the management tools installed is different so I'm mostly using 20.04 still. On that page locate the focal-server-cloudimg-amd64.ova and download it. Once finished go back to Xen Orchestra and click Import -> VM then select the Pool and SR you want to import to. Drag and drop the downloaded OVA file into the field or click the field and select the OVA.
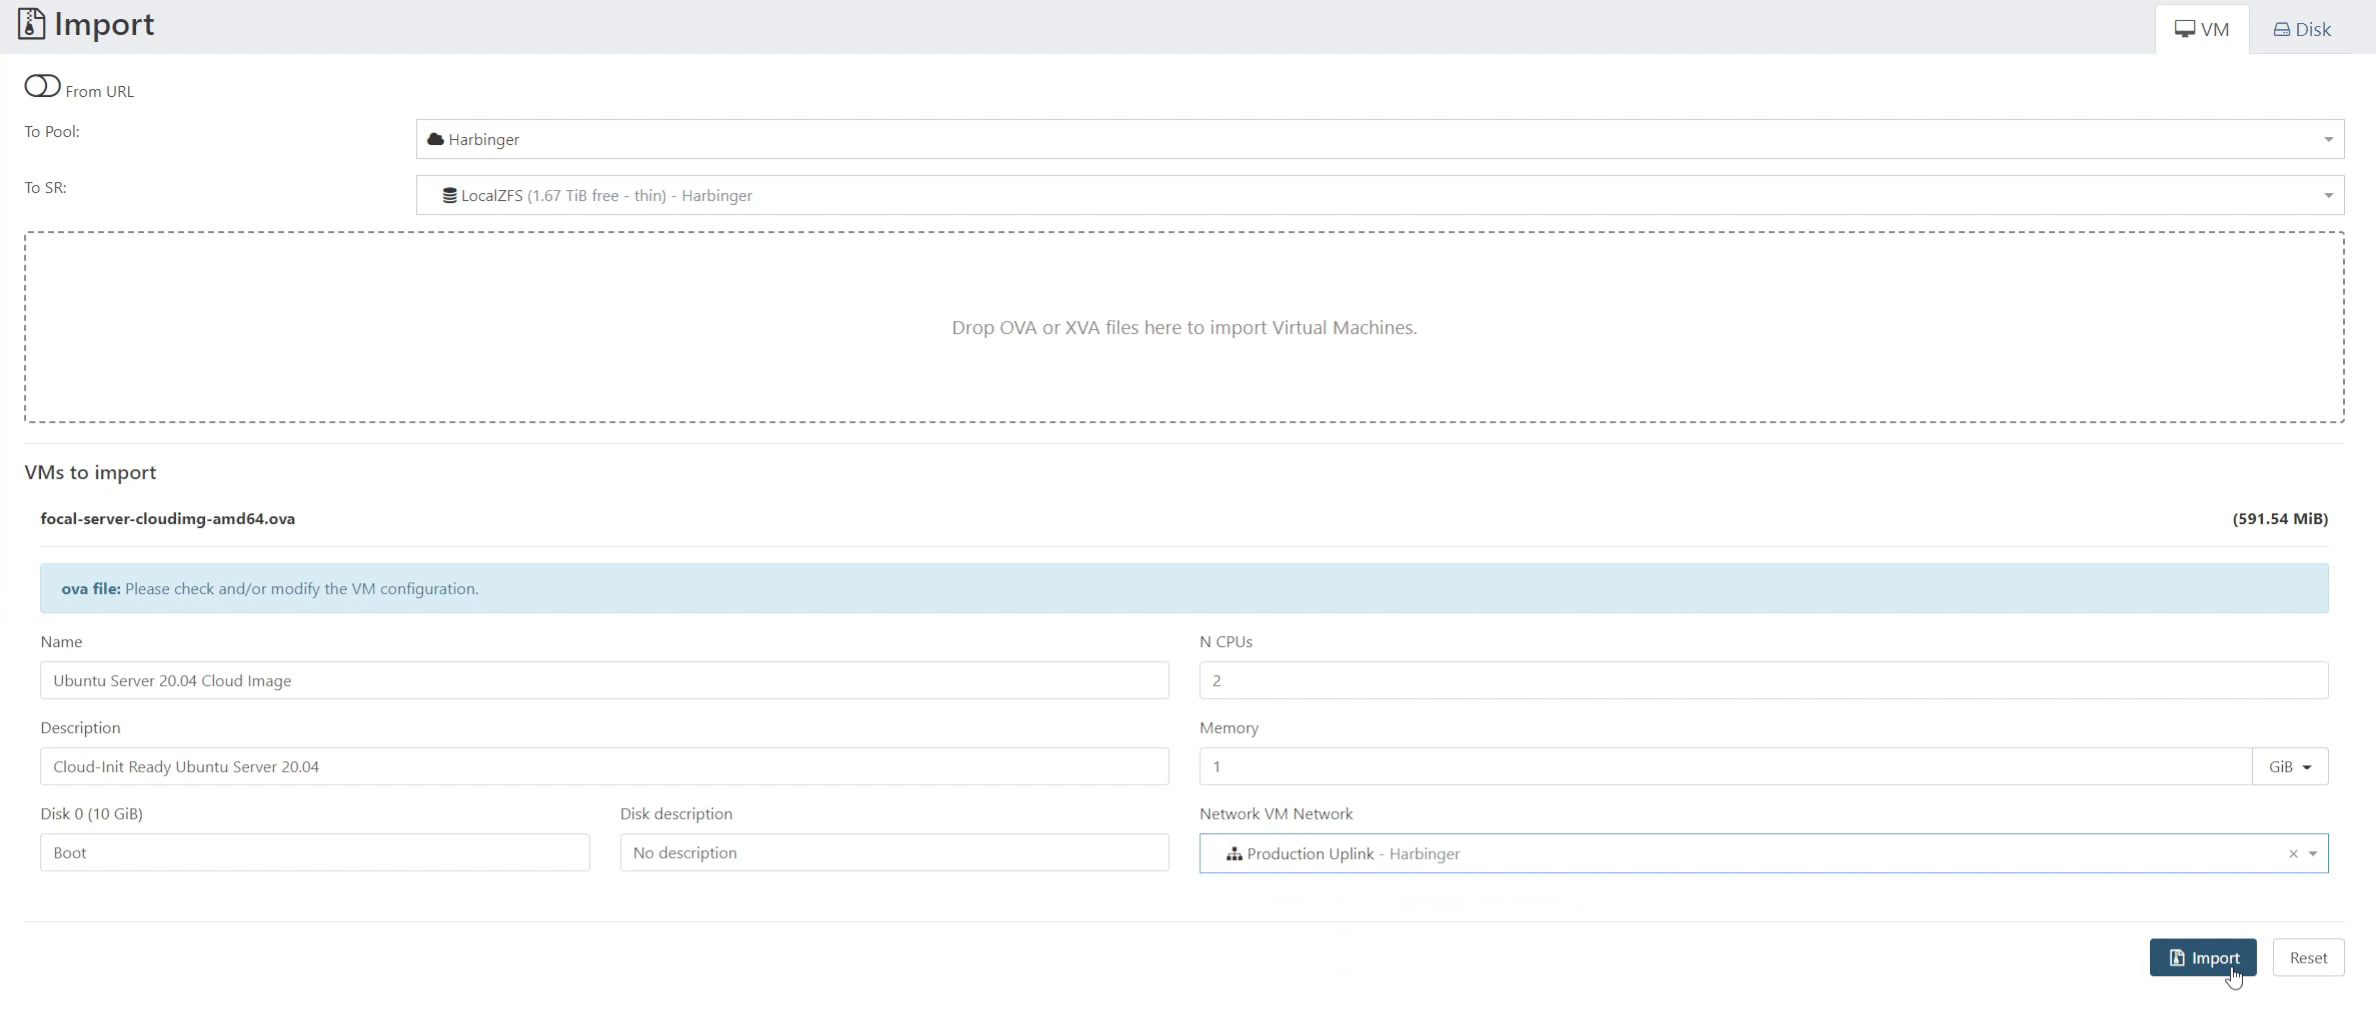
I added a description, set CPUs and RAM to 2, changed the Disk0 name to "Boot", and set the network to Production Uplink. Set these how you wish and click import. This is actually importing a VM which we will then convert to a template.
Once the import is completed you'll be brought to the VM's page. Go to the Advanced tab and click Convert to template. This will now show up under Home -> Templates.
The next component is getting cloud init configured. Go to Settings -> Cloud Init
Under Cloud Config enter a name like "Ubuntu Default" and then begin editing the template. There are many options in the cloud init documentation which should be looked over, but this is a basic config:
#cloud-config
hostname: {name}
timezone: America/New_York
users:
  - default
  - name: netserv
    passwd: passwordhash
    ssh_import_id:
      - gh:guthub_account
    sudo: ALL=(ALL) NOPASSWD:ALL
    groups: users, admin, sudo
    shell: /bin/bash
    lock_passwd: true
    ssh_authorized_keys:
      - ssh-ed25519 yourkey
package_update: true
packages:
  - xe-guest-utilities
package_upgrade: true
runcmd:
  - sudo reboot
This will set the hostname of the VM to the VM's name in Xen Orchestra, set the timezone, create a user called "netserv" with a password of "passwordhash" (you should use a hash here), import SSH keys from github, allow passwordless sudo, set groups, set shell to bash, disable login with password, import an ssh-ed25519 key, update all packages, install the xen guest utilities from apt, upgrade packages again, and finally reboot.
The Network config is much easier. Name the template something like "Any Network DHCP". Here is how to setup DHCP for IPv4:
version: 2
ethernets:
    eth0:
        dhcp4: true
        dhcp6: false
You can also use this to set a static IP. I create a template for each subnet so I have less to adjust when creating a VM:
version: 2
ethernets:
    eth0:
        dhcp4: false
        dhcp6: false
        addresses:
          - 172.16.100.185/24
        gateway4: 172.16.100.1
        nameservers:
          addresses:
            - 172.16.100.21
            - 172.16.100.22
            - 1.1.1.1
          search:
            - dev.themaw.tech
Click on the Edit pencil when done on each to save. Make sure to adjust the address when making a VM as to avoid duplicates.
With the basics on cloud-init set we can make our first VMs!
Creating Virtual Machines
We'll start with an Ubuntu VM, on Xen Orchestra go to New -> Virtual Machine. Select the Pool and you want to create the VM on. Then select a template, use the template we made earlier, set a name (will be used for hostname so keep the naming constraints in mind), description, vCPUs, and RAM. You can choose a few different config options: no config drive (if you use an ISO or pre-configured template), SSH key (will import SSH keys only, set under the user), and Custom config. We'll use custom config and pick the 2 templates we created earlier. Production Uplink should already be selected for the interfaces, under disks increase the size to something reasonable. The Ubuntu template we have includes growfs to expand the file system to the full size of the disk available. When done click create.
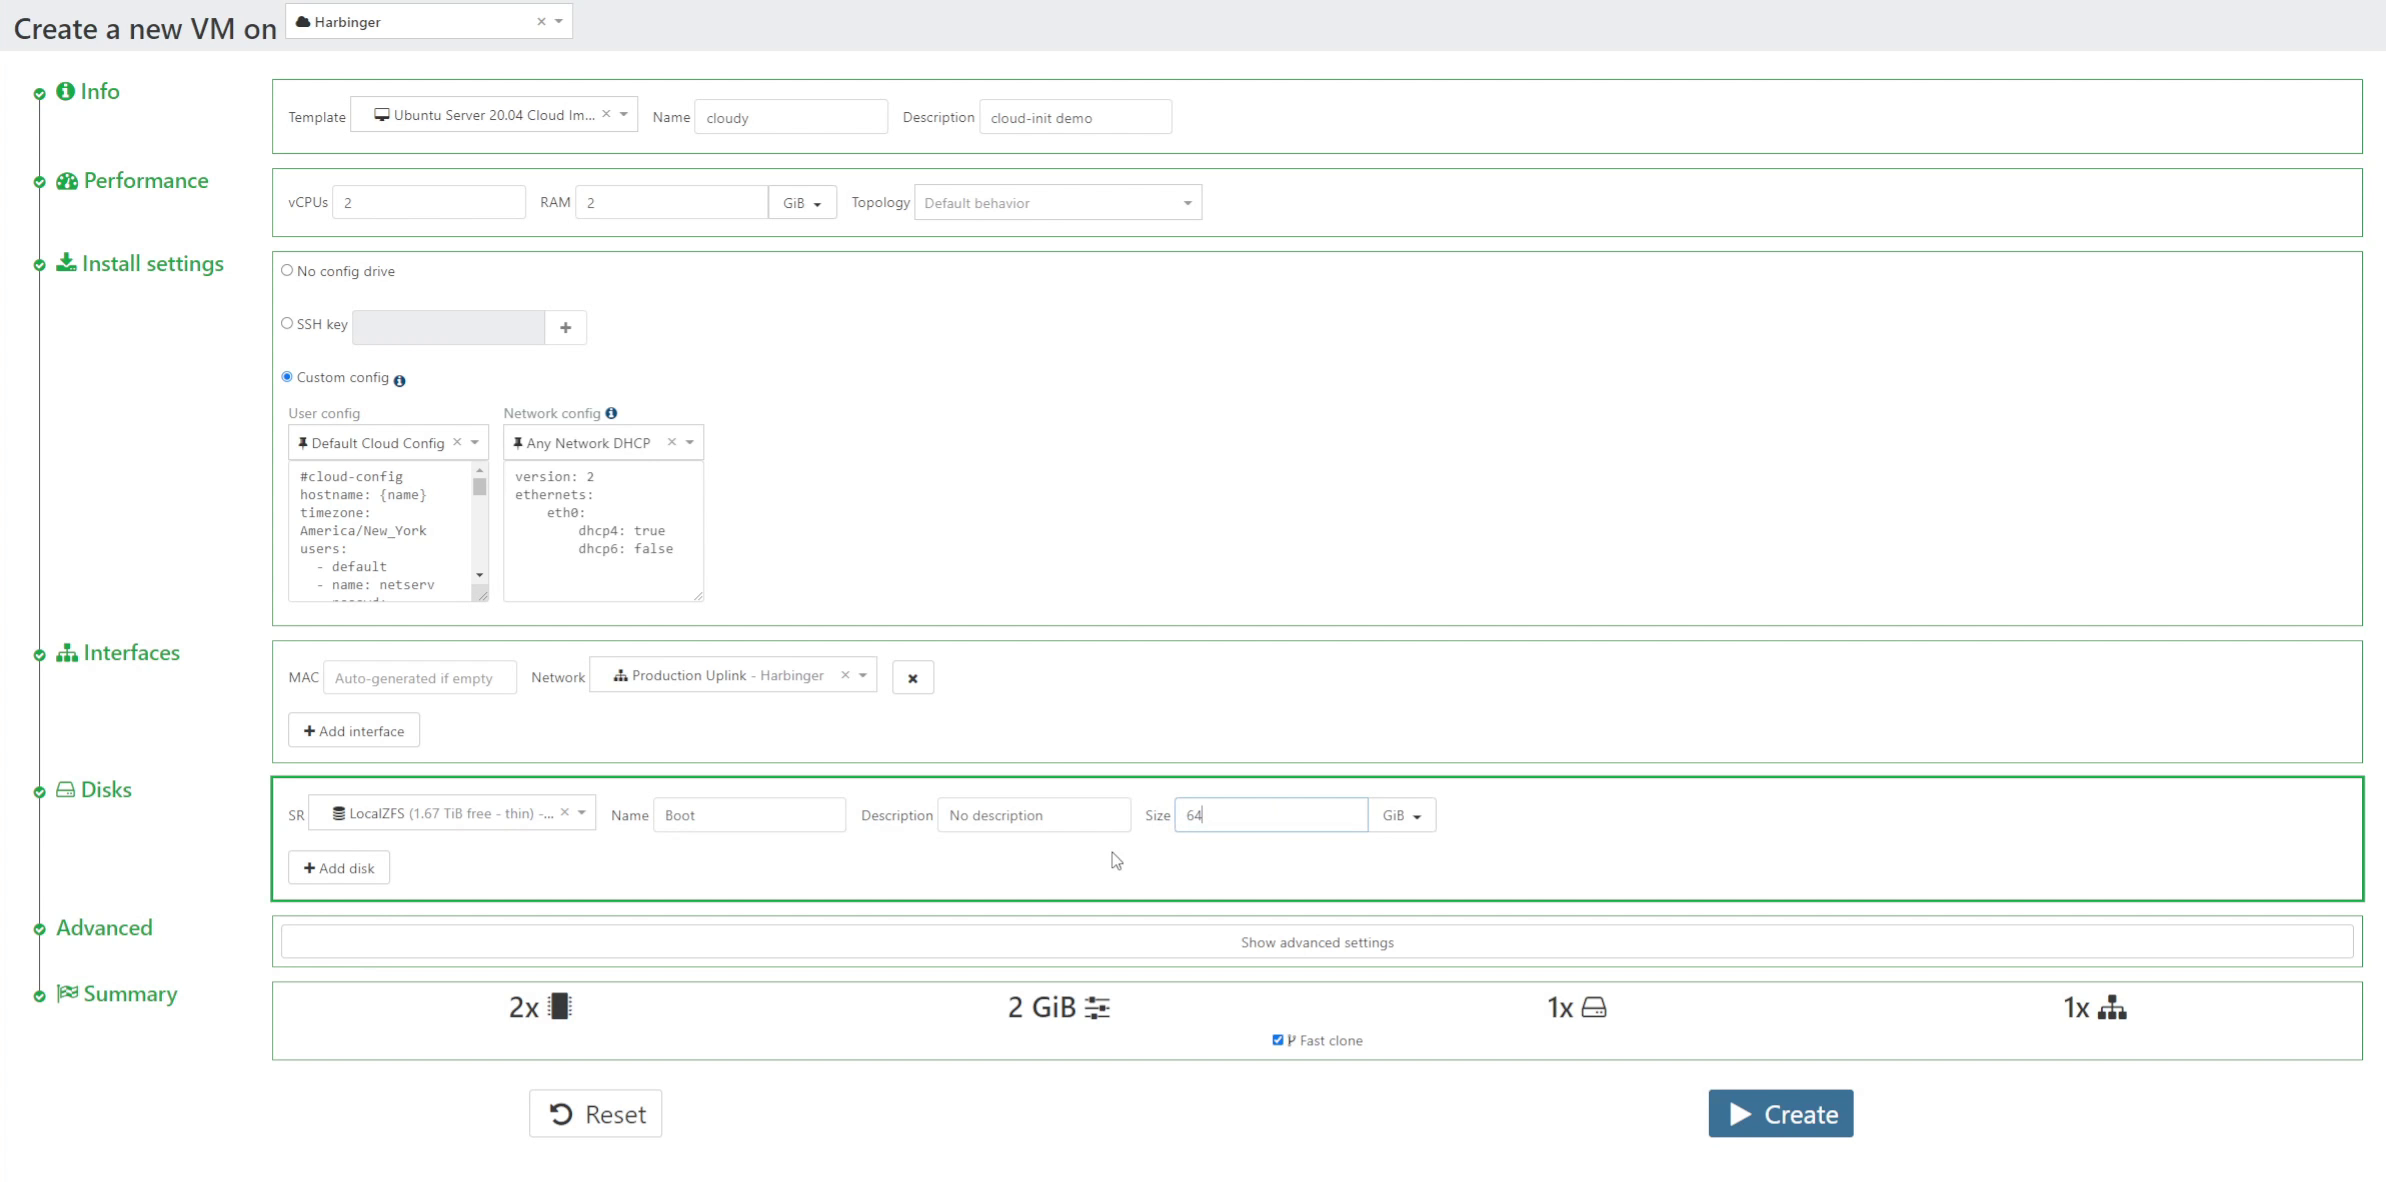
The VM will start up once it's created and cloud-init will begin. This will take a while, so watch for the Management Agent to show up under General and for reboots as cloud-init finishes. Once it is done, you can get the IP address from the General tab and SSH into the VM. Running
lsblkshould show you that the file system is indeed taking up the 64GB of storage we gave it. The hostname on the left of the shell should also match the VM name.
Using the template like this makes creating VMs repeatable and consistent. It also allows for the creation of multiple VMs which can be found under Show advanced settings on the VM creation page.
From here you can configure the VM how you wish, either over SSH or by using a tool such as Ansible. I'd like to look into using tools such a Teraform to create VMs, so hopefully there will be a blog about that.
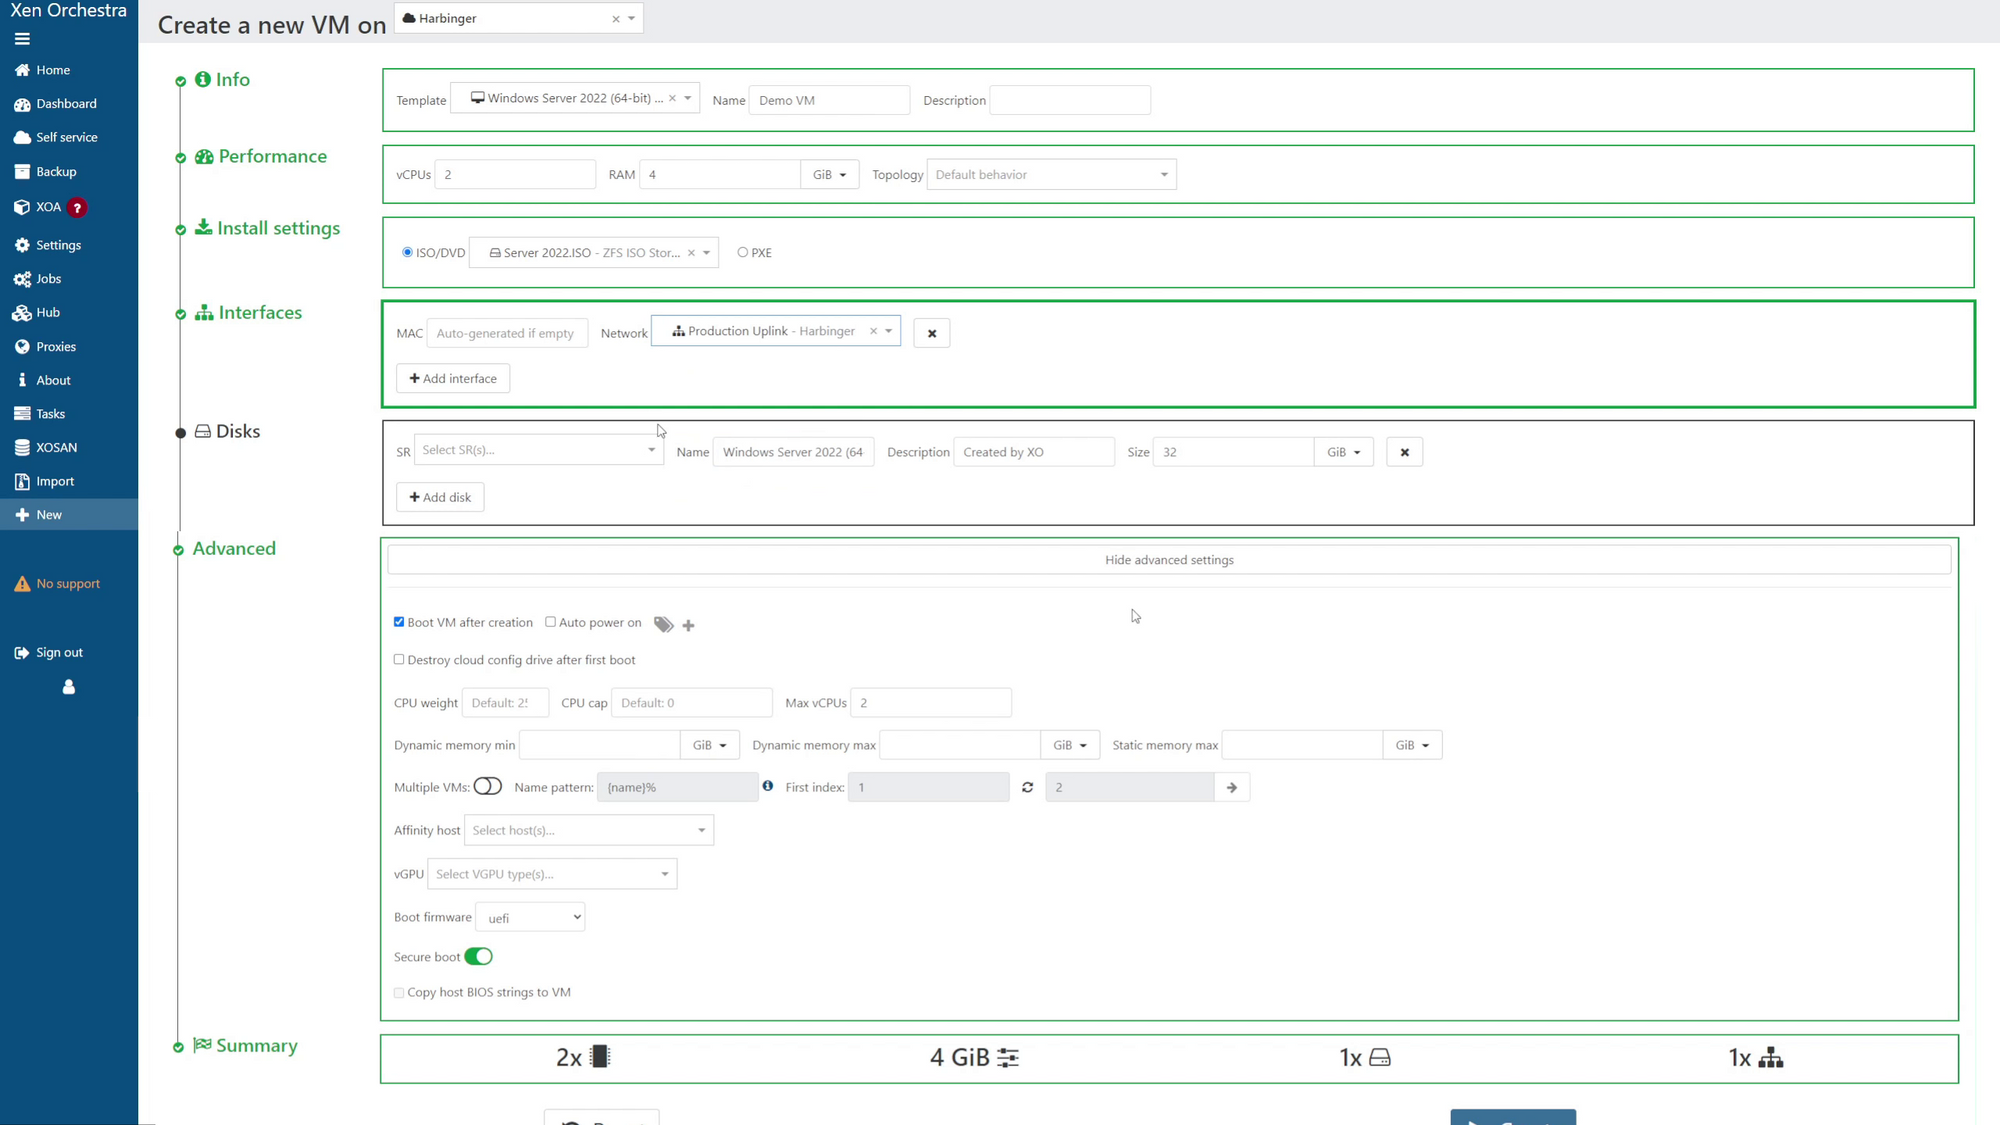
Creating a Windows VM is similar but we won't be using a template for this, it'll be manual. Go to New -> Virtual Machine and select the pool and host you want the VM to be on.
Select the Windows Server 2022 template. Enter a name and description. Set the number ov vCPUs and RAM you want, I did 2 cores and 4GB of RAM. Select the Server ISO we uploaded earlier, select the SR you want to install to, name the drive, set a description if you wish, and specify a size. Under the advanced settings we're going to enable Secure boot for this VM.
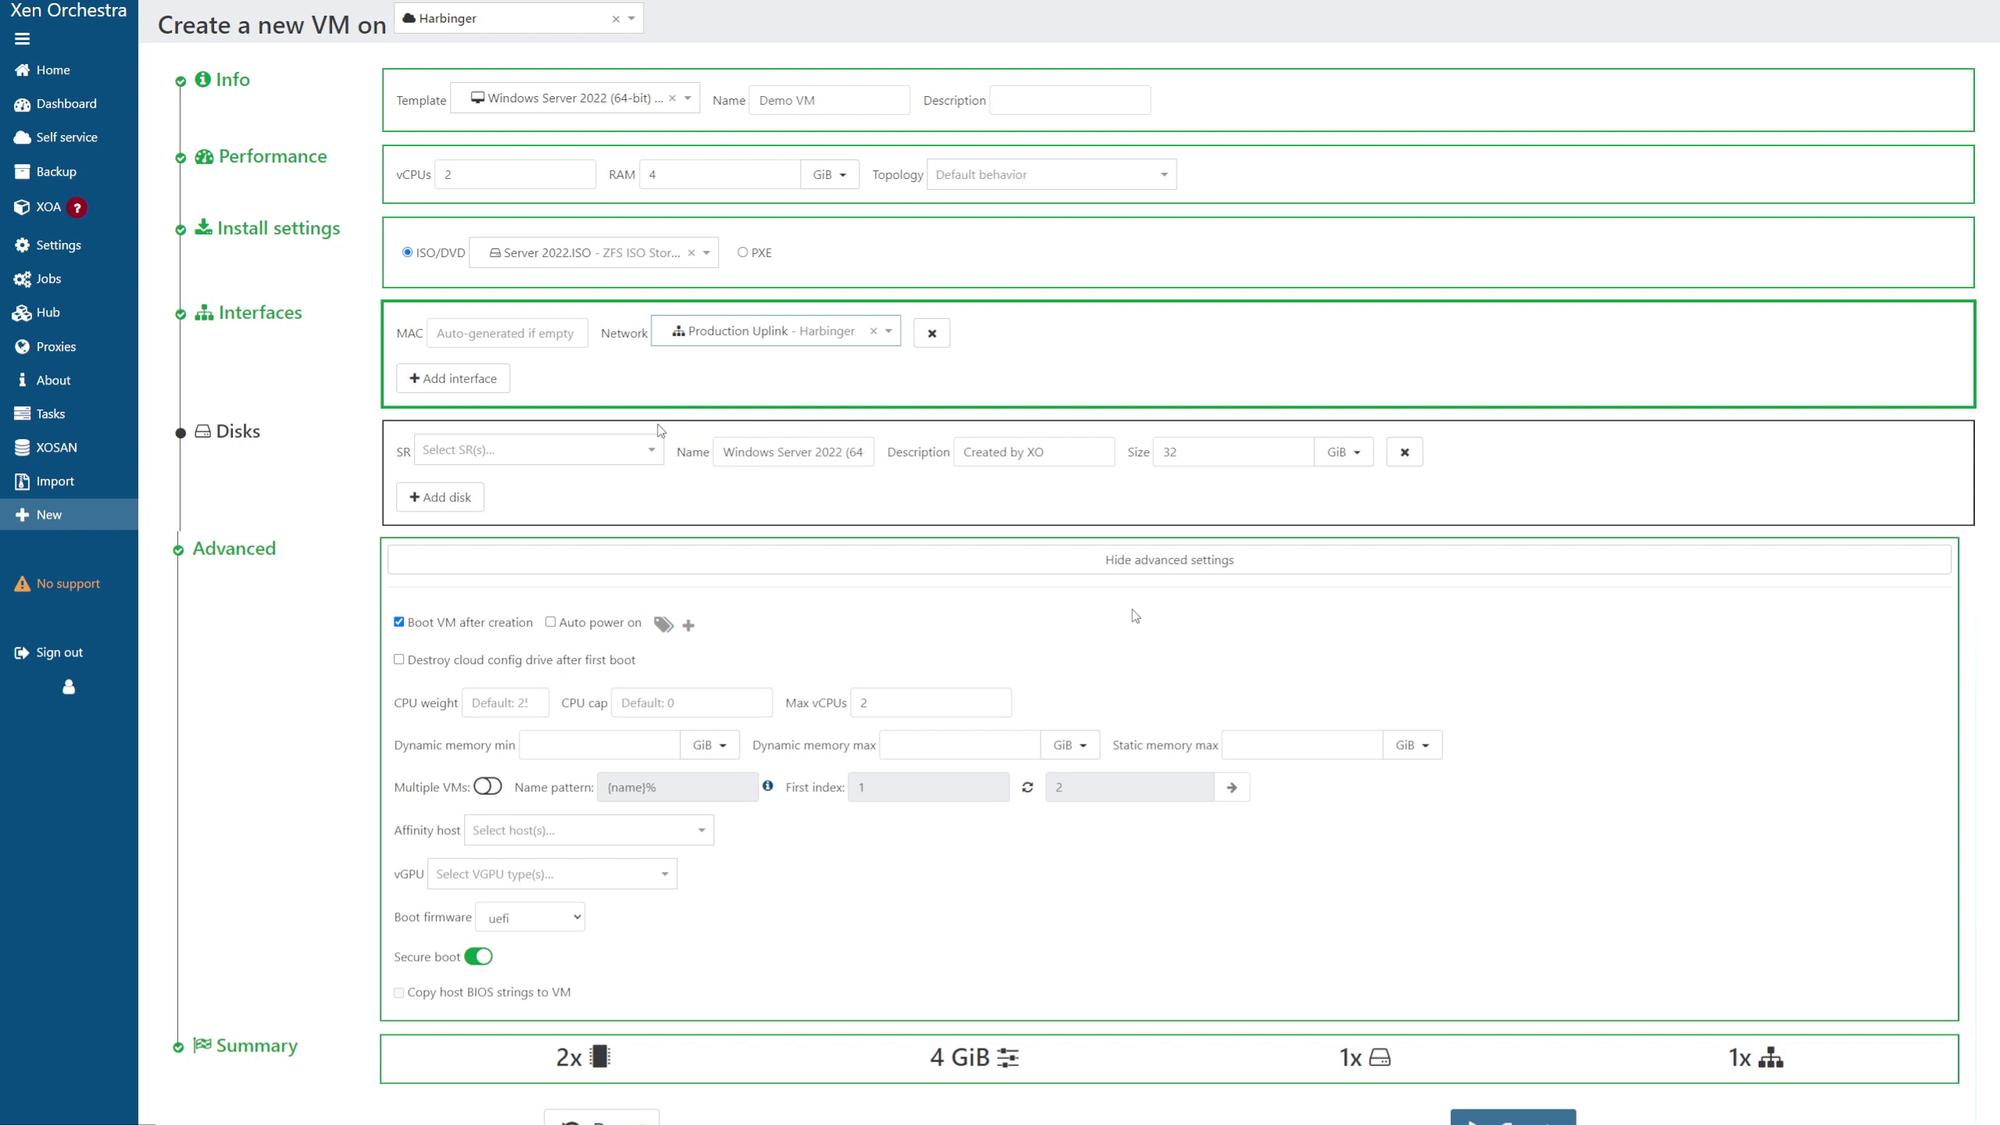
When you're done click Create and once the process is finished you'll be brought to the VM's page. I like to adjust the console resolution for Windows VMs so go to the Console tab and when the system is booting and Tiano Core is present press delete to boot to the UEFI. Once there go to Device Manager -> OVMF Settings and press Enter on "Change preferred resolution for next boot" to select the resolution. I usually do 1600 x 900 but set it to what you want. Hit Enter on Commit Changes and Exit to save, then press Escape and Reset to reboot with the changes committed.
When prompted to press any key to boot to the installer, do so. In the Windows installer hit next to proceed then install now. Select the edition you want, I did Datacenter with GUI, agree to the terms, select custom install, then the disk you want to install to. Press next and then wait for the install to finish.
Once it's done you'll be prompted to set an administrator password and be dropped at the login screen. Log into the server, you'll notice we don't have any management tools installed. There are 2 routes you can go here: XCP-NG's open source or Citrix's proprietary closed source. I use the Citrix ones personally as the XCP-NG ones are quite old and perform worse. Hopefully that will change in the future as Vates is looking for a maintainer still.
You'll need a Citrix account, sign up or log in and then download the management agent MSI. Run through the installer as normal and reboot the server. I do not enable automatic IO driver updates to prevent possible interruptions to my servers. Once the VM reboot is completed you should see IP address and OS information populate under the General tab.
Conclusion
The video goes through some of the menus fairly quickly, but I'll hold off on anything else until I can do a more detailed post here. There is also some very quick disk benchmarking in the video if you're interested.
At this point you should have a functional XCP-NG install with Xen Orchestra to handle VM, host, and pool management. Feel free to take a look around the interface and the documentation to see just how powerful this combination is.
There will likely be some follow up posts on how to do specific tasks so that there are smaller more digestible segments instead of a large monolithic post like this one.
If you made it this far, thank you!


